
How to Choose the Best FM Radio Transmitter Kit

Choosing a Fm Radio Transmitter Kit involves more than comparing prices or advertised range. The right kit should match your project, technical skill, and intended operating environment. A classroom demonstration, a small audio experiment, and a hobby bench setup may call for different features. Start by checking the supported frequency range, output specifications, power requirements, and antenna connection. These details affect compatibility and performance. They also help you avoid buying components you do not need.

Look for clear assembly instructions, a complete parts list, and reliable technical support. A well-documented kit makes it easier to identify a loose connection or troubleshoot weak audio. Check whether it includes a stable power supply, an enclosure, and the tools or components required for assembly. Small details matter. So does ventilation. Read the manufacturer’s specifications carefully, since advertised range can vary with the antenna, surroundings, and setup. No kit can promise identical results everywhere.

Safety and compliance deserve equal attention. Use the kit only for permitted purposes, and verify the applicable frequency and transmission limits in your location before operating it. Rules differ between regions. When comparing options, favor transparent specifications over dramatic marketing claims. Consider how you will test audio quality and signal stability without interfering with other services. A cheaper kit may work, but missing documentation can make troubleshooting frustrating. That trade-off is easy to overlook. This guide will help you assess the practical criteria, ask better questions, and choose a kit suited to your needs—not just the most impressive listing.
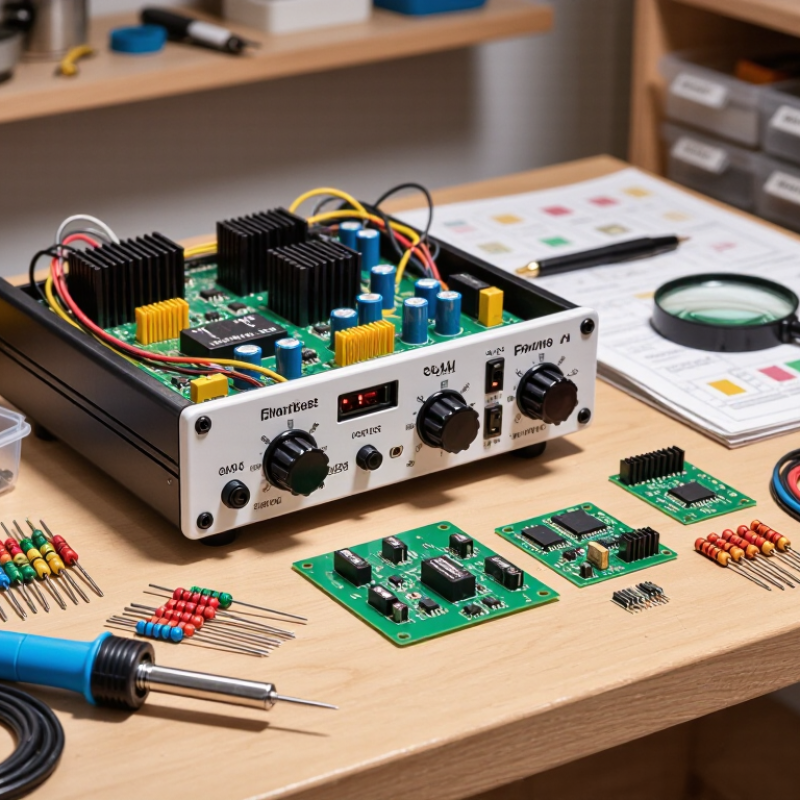
How to Choose the Best FM Radio Transmitter Kit

What an FM Radio Transmitter Kit Is and How It Works

An FM radio transmitter kit turns an audio signal into a radio-frequency signal that a nearby FM receiver can pick up. A typical kit includes an audio input, an oscillator or modulator, a small transmitter circuit, and an antenna. The audio changes the carrier’s frequency slightly; this process is called frequency modulation. The antenna then radiates the signal, and a radio tuned to that frequency demodulates it back into sound. Simple, in principle.

The International Telecommunication Union’s Recommendation ITU-R BS.450 describes technical characteristics for FM sound broadcasting in the VHF band; the usable broadcast range varies by region. A kit’s frequency setting and output therefore matter, and operation should stay within local rules and permitted limits. For a basic check, connect a phone or microphone, tune a receiver, and listen for clear audio without nearby interference. A loose antenna or poorly set input level can produce weak or distorted sound. Noise still matters.

The receiver side helps explain FM’s appeal: Nielsen’s 2024 Audio Today report estimates that AM/FM radio reaches about 91% of U.S. adults weekly. That figure describes radio listening, not the range of any particular kit. Range depends on antenna placement, obstacles, receiver quality, and the surrounding radio environment. A transmitter beside a window may sound clearer than one behind metal shelving. I would not assume the advertised coverage holds indoors; real rooms are messy, and a short listening test can reveal more than a specification sheet.

How to Define Your Range, Audio, and Power Requirements

Define the listening area before comparing transmitter power. A workshop, a garden, and a campus need different coverage. Measure the farthest listening point, then note walls, hills, and nearby buildings. These obstacles can weaken FM signals, so a wattage number alone cannot predict usable range. ITU-R Recommendation P.1546-6 models terrestrial signal propagation from 30 MHz to 4 GHz; its method highlights how frequency, terrain, and distance affect field strength. Treat any range estimate as provisional. Check local operating limits and use only equipment suited to authorized operation.

Audio needs equal attention. Choose a kit with clean input connections, adjustable level, and stable frequency control. Test it with the actual source: a phone, mixer, or computer may produce different output levels. The EBU R 128 recommendation sets a broadcast loudness target of −23 LUFS, a useful reference when preparing consistent program audio, though it is not an FM transmitter specification. Listen for hiss, clipping, and level changes at both the transmitter and receiver. That matters. Keep it modest. A common planning mistake is buying excess power to compensate for poor placement; moving the antenna higher or clearing an obstruction may help more. I would still recheck coverage after installation, because indoor reception can be stubborn.

How to Choose the Best FM Radio Transmitter Kit - How to Define Your Range, Audio, and Power Requirements

Planning Dimension What to Define Typical Considerations Selection Guidance
Coverage area Where listeners need reliable reception: a room, building, campus, or wider service area. Coverage depends on transmitter output, antenna type and placement, antenna height, terrain, buildings, receiver quality, and local interference. No single power rating guarantees a particular distance. Map the intended listening area and test reception at its boundaries. Choose an antenna and installation suited to the site, and verify that the planned coverage is permitted locally.
RF output power The transmitter's permitted conducted output and the complete system's effective radiated power. Power is commonly specified in watts or milliwatts. Antenna gain and feed-line loss affect radiated power; regulatory limits can apply to output, emissions, antenna systems, and operating conditions. Do not select power by distance alone. Check the applicable rules and authorization requirements before transmitting; use only the minimum compliant output needed for the application.
Frequency and compliance The permitted FM frequency, required authorization, and technical limits in the operating location. FM broadcast allocations and low-power-device rules vary by country and region. Available frequencies, channel spacing, power limits, and licensing conditions are not universal. Consult the relevant spectrum regulator before purchase or operation. Confirm frequency stability, occupied bandwidth, and emissions requirements for the intended service.
Audio quality Source type, number of audio channels, desired loudness, and whether speech or music is the priority. Check supported inputs, stereo or mono operation, frequency response, signal-to-noise ratio, distortion, and audio level controls. Source quality and processing also affect the final sound. Match inputs to the audio equipment and look for clear specifications. Set levels to avoid clipping, and use appropriate audio processing without excessive compression.
Antenna and installation Antenna location, polarization, cable length, connector type, and exposure to weather or electrical hazards. An unsuitable antenna or poorly matched feed line can reduce performance. Placement near obstructions can affect coverage, while outdoor installations may require grounding and lightning protection. Confirm antenna compatibility and follow installation and safety guidance. Use qualified help for rooftop, tower, grounding, or lightning-protection work.
Power supply and operating environment Available mains or DC power, expected run time, ventilation, and indoor or outdoor use. Check the required voltage, current capacity, connector polarity, and power consumption. Enclosures and operating-temperature ratings matter where equipment faces dust, moisture, or heat. Choose a supply that meets the transmitter's stated electrical requirements. Allow adequate ventilation and use suitable protection for the installation environment.
Monitoring and reliability How the operator will check frequency, output, audio, temperature, and faults during use. Useful features may include status indicators, frequency lock, thermal protection, adjustable audio input, and accessible service documentation. Prioritize clear operating controls, stable performance, and documented specifications. Plan periodic checks of the signal and installation.

Which Technical Specifications to Compare

When comparing FM radio transmitter kits, start with frequency coverage and tuning resolution. The range should match your intended, permitted use, while finer steps make it easier to select a clear channel. Check frequency stability, too. A transmitter that drifts as it warms can sound fine at first, then become harder to receive.

Output power matters, but more is not automatically better. Compare the stated power with your application and local limits, and check whether the figure is measured consistently. Numbers can mislead. Look for clear specifications on modulation and audio response; these affect voice clarity and music tone. If possible, review distortion and signal-to-noise figures, while remembering that test conditions can differ between manufacturers.

Inspect the connections and power requirements before buying. An audio input that matches your source saves adapters, and a clearly specified antenna impedance helps you choose compatible equipment. A metal case and sensible ventilation can help manage heat during longer sessions. Check whether the kit includes setup instructions and gives practical guidance for testing into an appropriate load. Small details matter. I would still leave room for doubt: published specifications do not replace careful setup, and a neat-looking circuit board cannot prove performance on its own.

How to Choose the Best FM Radio Transmitter Kit: Which Technical Specifications to Compare

Frequency coverage is a first check: choose a kit that supports the FM band permitted where you will operate. Common ranges shown here are 88–108 MHz in the US and Canada, 87.5–108 MHz in many European markets, and 76–95 MHz in Japan. Local rules can vary, so verify the applicable allocation and power limits before transmitting. Also compare output power, antenna impedance and connector, stereo capability, frequency stability, and harmonic suppression.

How to Check Kit Components, Compatibility, and Safety

Before buying an FM radio transmitter kit, check the parts list against the work you plan to do. A useful kit should identify the circuit board, power supply requirements, connectors, enclosure, and included instructions. Small details matter. Confirm that its frequency range and output settings suit your intended use and local requirements. Check connector types too: an audio cable that does not fit can mean extra adapters, while an unsuitable power supply may damage the board. If the manual is vague about voltage, antenna connections, or assembly steps, ask the seller or a qualified technician before powering it up.

Compatibility is only part of the decision. Inspect the enclosure for exposed conductors, and check that ventilation is adequate during operation. Follow the kit’s stated polarity and never guess at wiring; a reversed connection can quickly ruin components. Not always obvious. Use only the antenna and test setup specified by the instructions, and confirm applicable radio rules before transmitting. Requirements can differ by location, frequency, and power level. Keep the unit away from liquids and leave space around it. A checklist can still miss something, so pause if a component runs unusually hot, smells burnt, or behaves inconsistently. Unplug it and investigate rather than continuing a test.

How to Test a Kit Before Making Your Final Choice

Before comparing FM radio transmitter kits, inspect the parts and instructions under good light. Check solder joints, connector fit, and whether the power supply matches the stated requirements. Small details matter. A loose audio plug can look like a faulty circuit. For a controlled bench test, connect the output to a suitable 50-ohm dummy load rather than an antenna. Use a receiver nearby, and check that the signal stays stable as the unit warms. If you have access to a frequency counter or spectrum analyzer, confirm the displayed frequency instead of relying only on a dial.

Test sound with a clear recording at a modest level. Listen for hum, harsh distortion, and changes in volume when you adjust the input. Then run the kit for 15 to 20 minutes and check for unusual heat or fading output. Keep notes; memory is less reliable than it feels. Do not transmit over the air unless your location’s rules permit the frequency, power, and use. A bench test cannot show how well a signal performs across a building, and that is an easy limitation to overlook. Compare documentation, measured results, and ease of adjustment before choosing.

CAMaster Logo